


The software, setup, nomenclature, and creating a media show can be a little daunting for a newbie; therefore, I will break it up into sections to cover all of the basics.
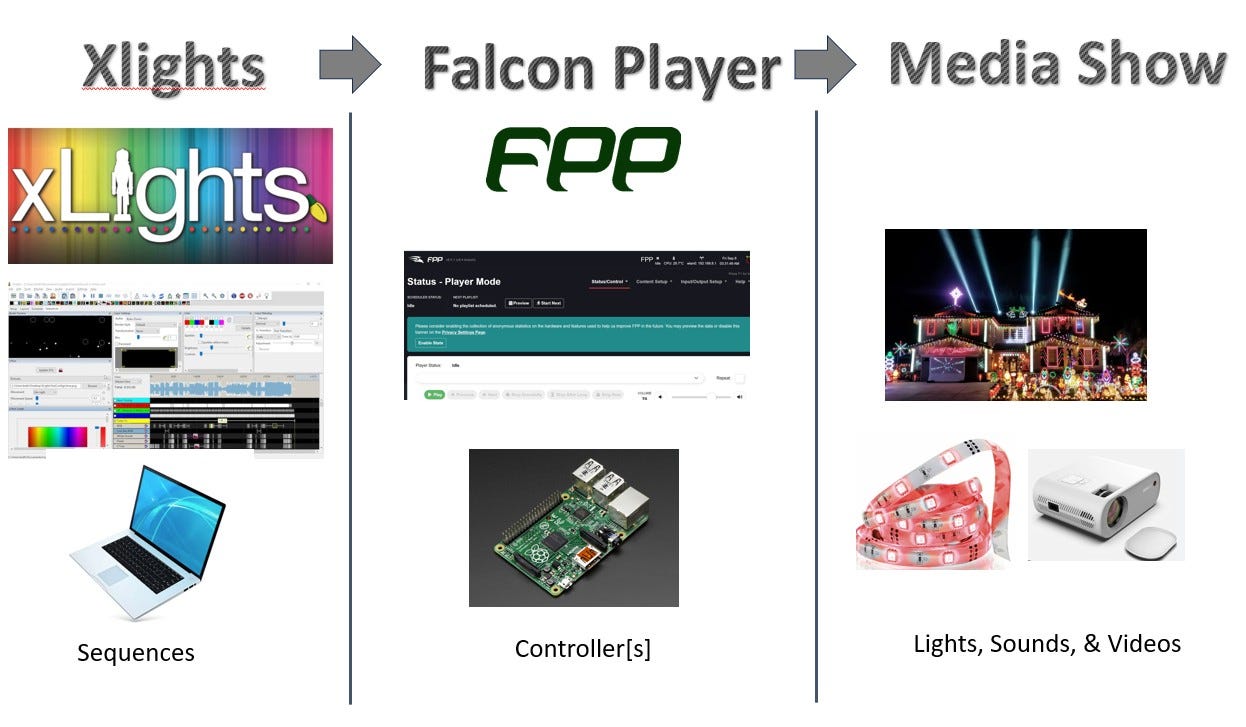
When creating an xLights media show, there are 3 main categories: xLights, Falcon Player, and the physical devices. xLights is used to design the light show based on the controllers and types of media hardware used in the show. xLights creates a sequence file that is downloaded to a controller(s). In my case, I will be using the Raspberry Pi as a controller. The controller runs Falcon Player. Falcon Player knows how to schedule and play the sequence files. The sequence files contain the logic turning on/off lights, video, etc. that are connected to the controller.
I started by setting up the Falcon Player on a Raspberry Pi 4/5. (update: 3/29/2025, the Pi 5 had issues for me. Pi 4 worked)
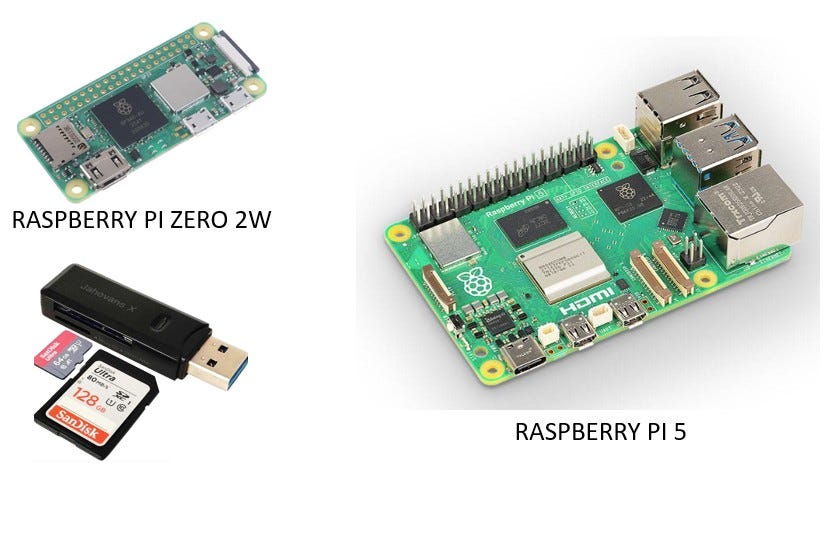
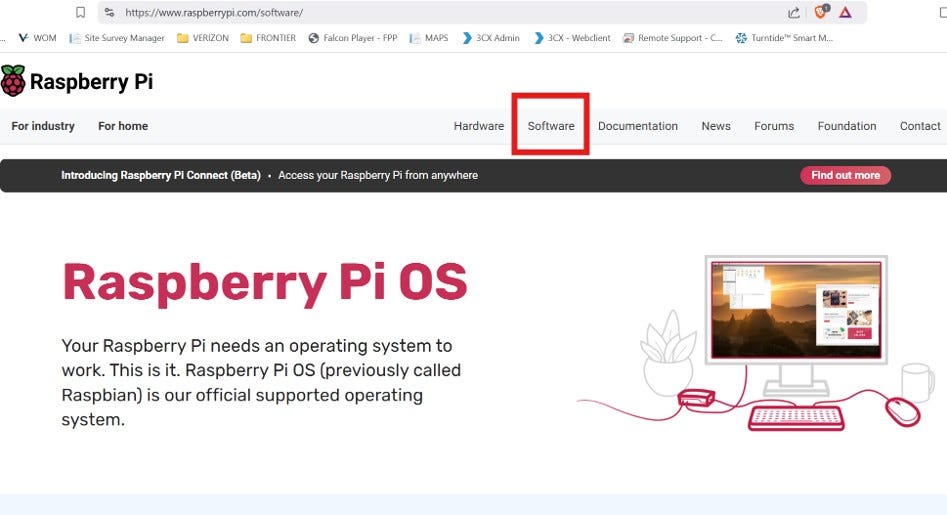
Falcon Player runs on a customized version of the Raspberry Operating System (Linux based distro). If you are not familiar with Raspberry Pi, one can be purchased for under $100. Once you have the hardware, you need to install the operating system on a microSD card to boot up the OS. Creating a bootable microSD card requires the Raspberry Pi imaging software to format the OS onto the microSD card. Download the imaging software from www.raspberrypi.com/software.
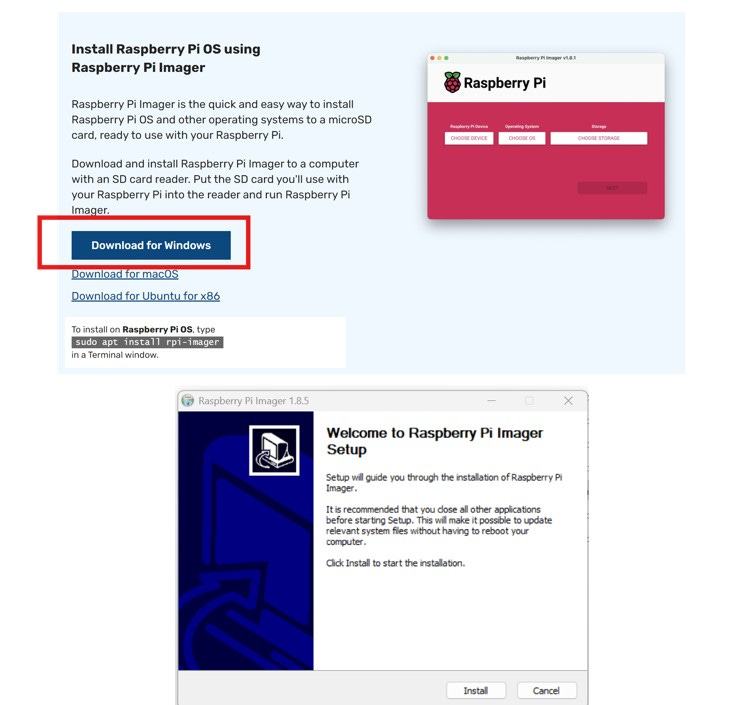
I’m using a Windows laptop, so I downloaded & installed the imaging software for Windows.
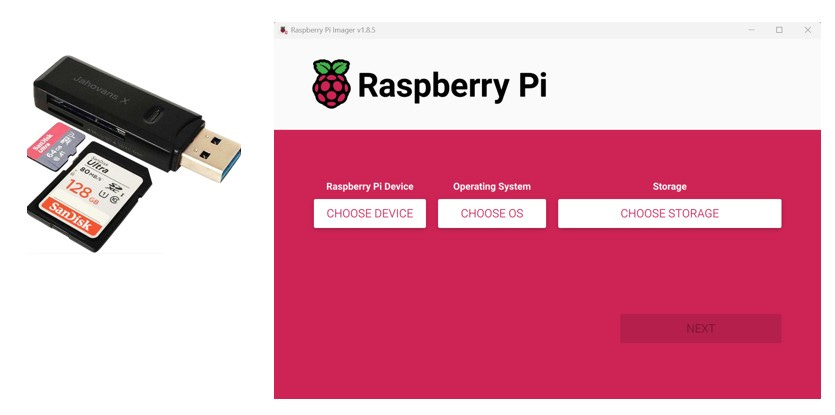
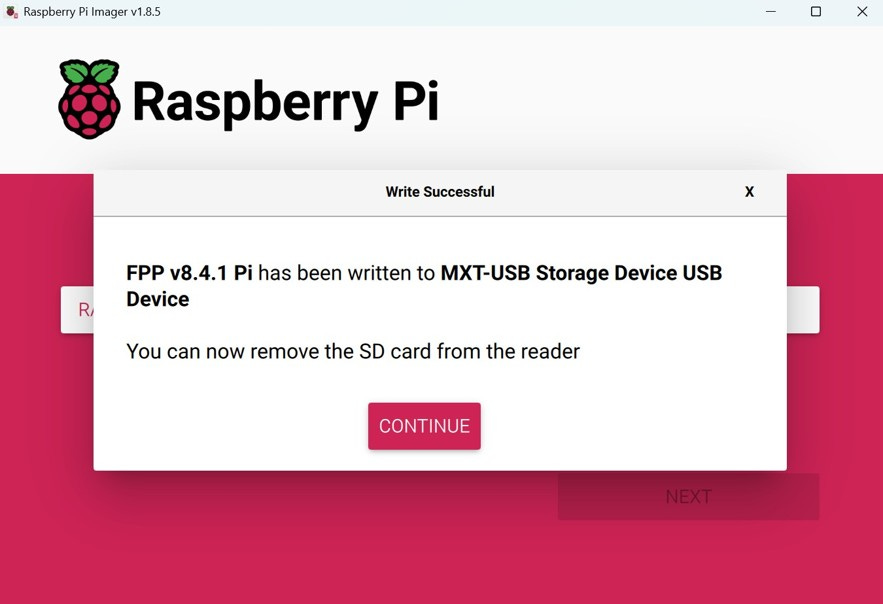
I purchased a USB flash drive that lets me read/write a microSD card. Insert the USB flash drive with the microSD card into the laptop’s USB port. Launch the imaging software. The imaging application shows a dialog that prompts for Device, OS, and Storage.
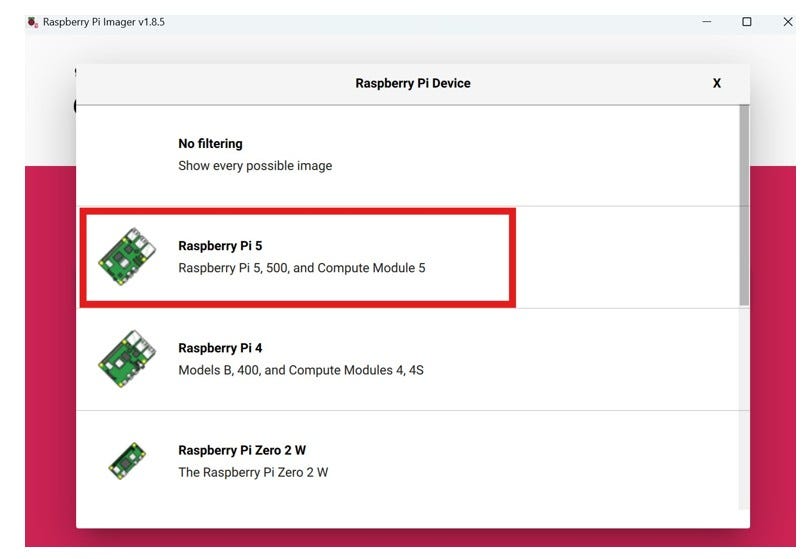
Select the Device.
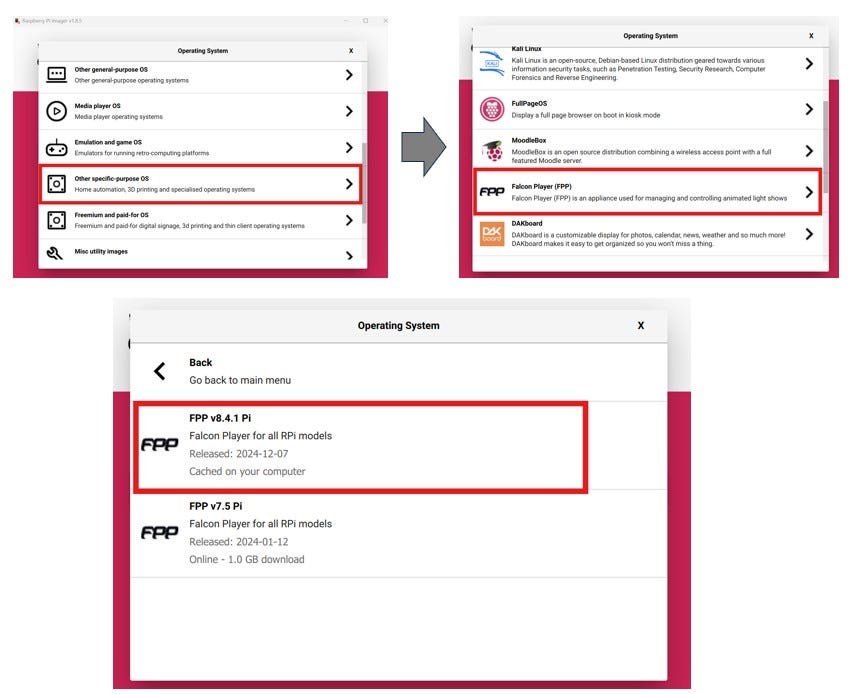
For the OS, look for Other specific-purpose OS and search for the Falcon Player (FPP) and select the latest version. (update 3/29/2025, Pi 4 8.4.1 worked for me, the Pi 5 did not work correctly. Also, you can get 8.4.1 and older releases from GitHub)
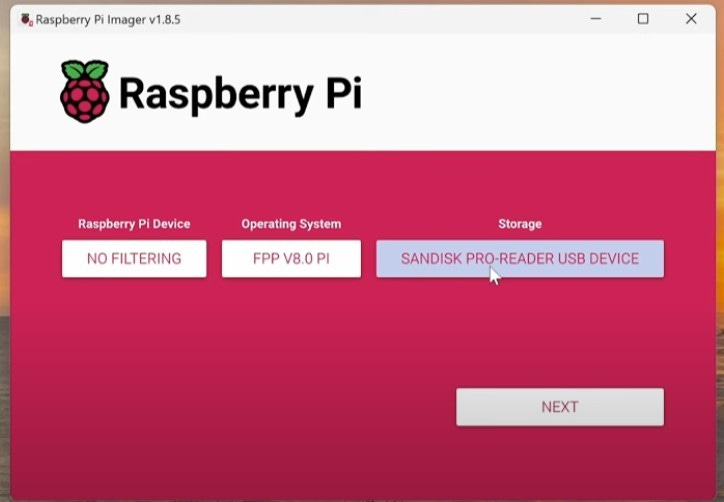
Finally, select the microSD storage drive. I think it’s hard to choose something else, but make sure you pick the microSD drive. Formatting your pc’s hard drive is not good.
When complete, remove the USB flash drive and put the microSD card in the Raspberry Pi.
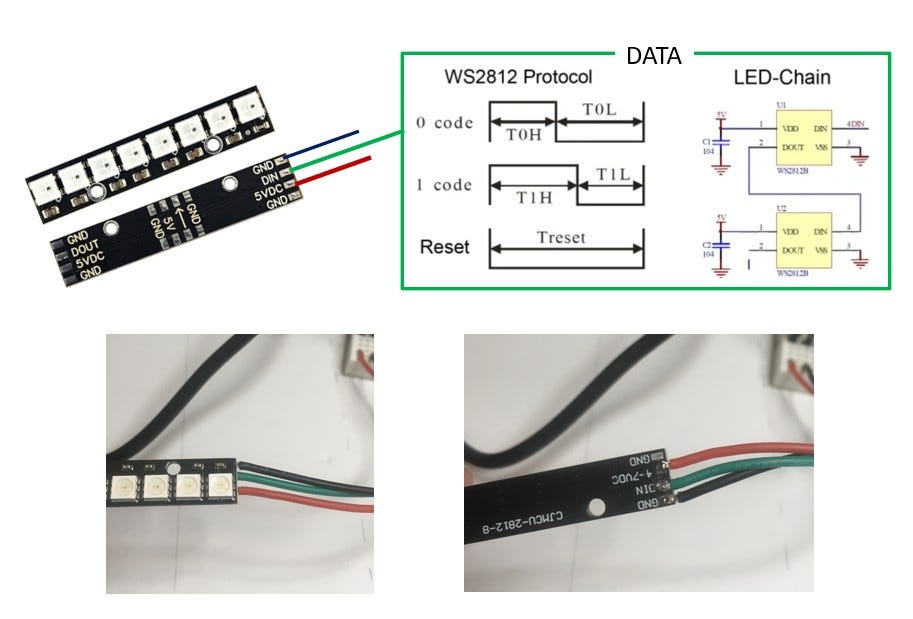
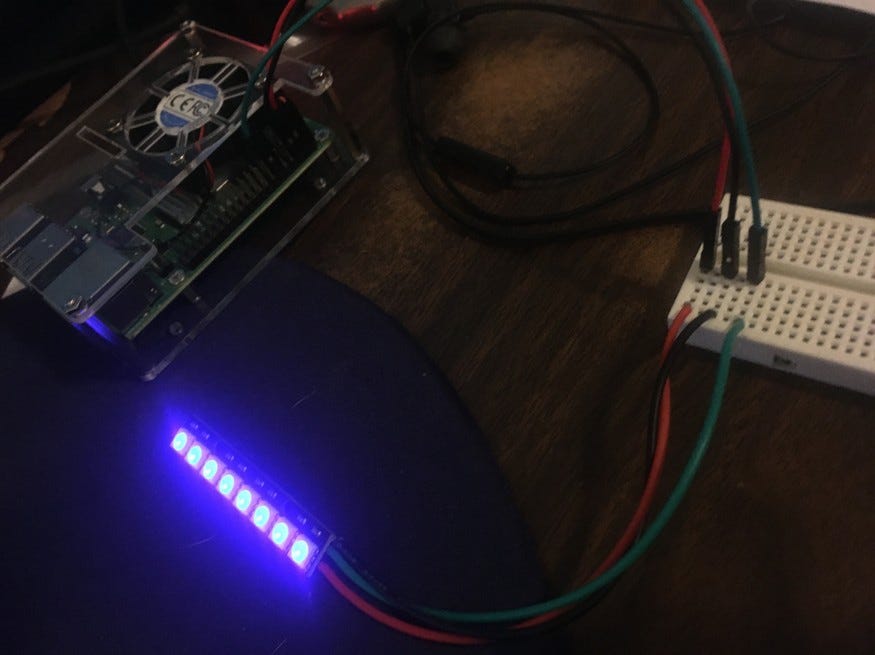
For the LED lights in the model, I bought several packs of “8 RGB LED Stick 8 X WS2812B”. To test the Falcon Player setup, I used one of the LED sticks and soldered three wires as shown. They take 5v and a data line. The WS2812 protocol is shown below. A signal is sent down the data line to set the color for each pixel.
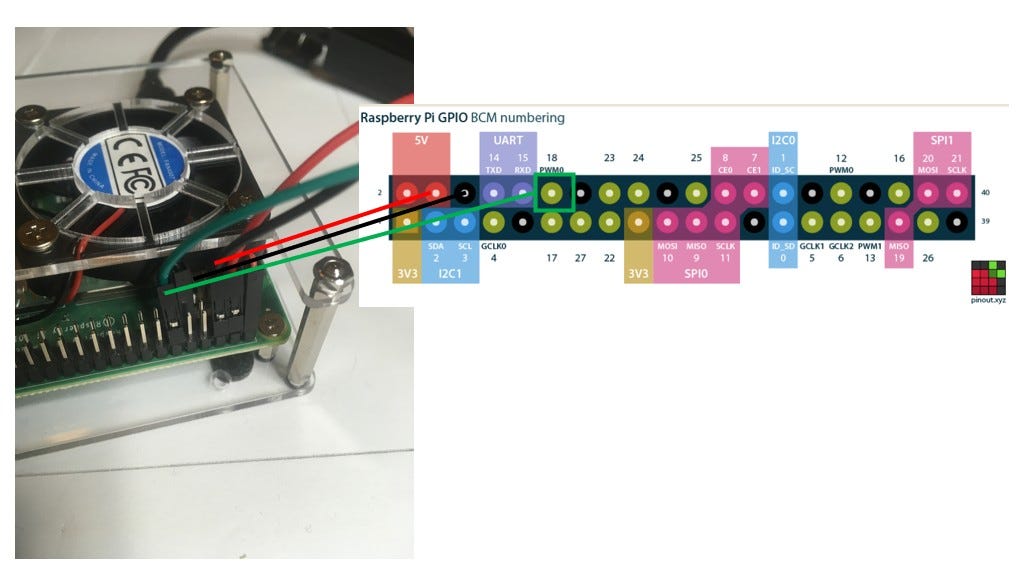
When connecting to the GPIO pins, connect the 5V, GND, and GPIO pin #18.
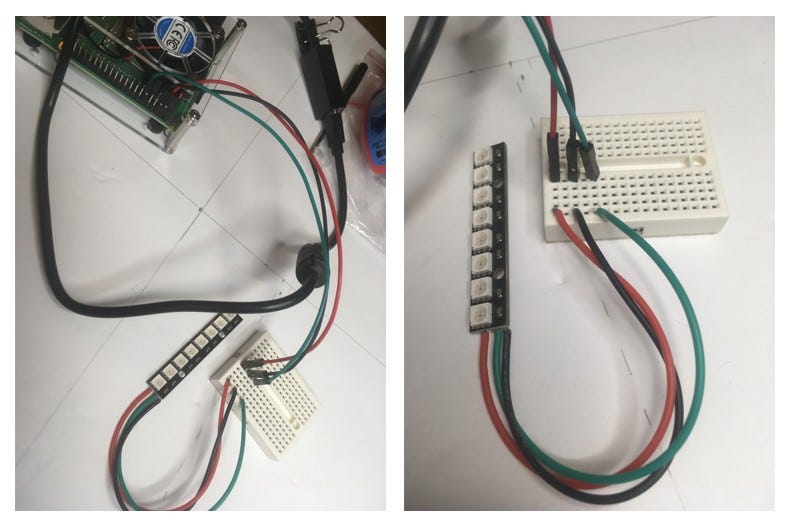
I used a breadboard to connect the Raspberry Pi to the LED Strip.
Now that the physical device is connected, turn on the Raspberry Pi. This will run the OS and then automatically launch the Falcon Player. The Falcon Player runs it’s own router (192.168.8.xxx) and will show up in the Window’s Wi-Fi list.
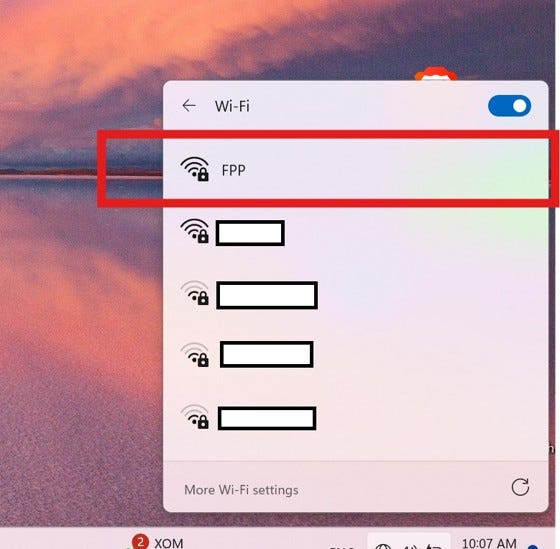
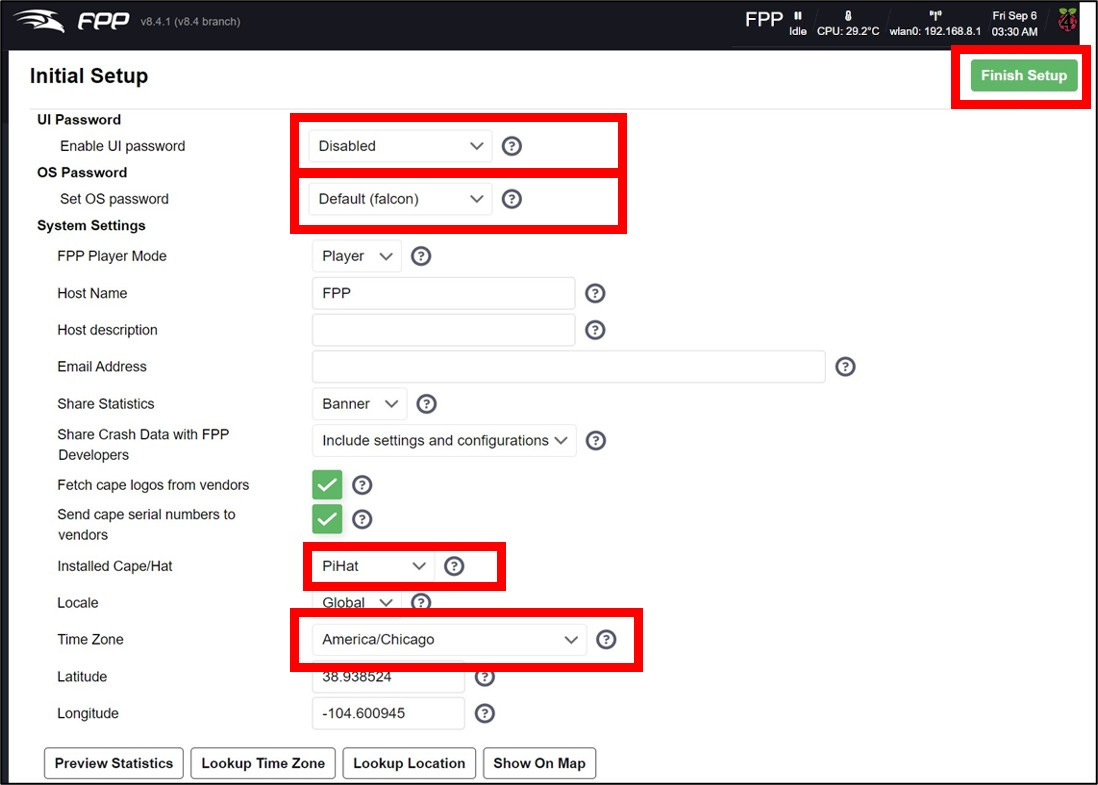
Connect to FPP and then browse to 192.168.8.1. I suggest saving that as a book mark, you’ll go to it often. This will take you to the Initial Setup screen. I initially set the UI Password to Disabled, OS Password to Default. Choose PiHat as the installed Cape/Hat. Optionally, choose a time zone. Click on Finish Setup and restart the Falcon Player. It takes a minute (or two) to restart. You can watch for it to show up in the Wi-Fi Network list.
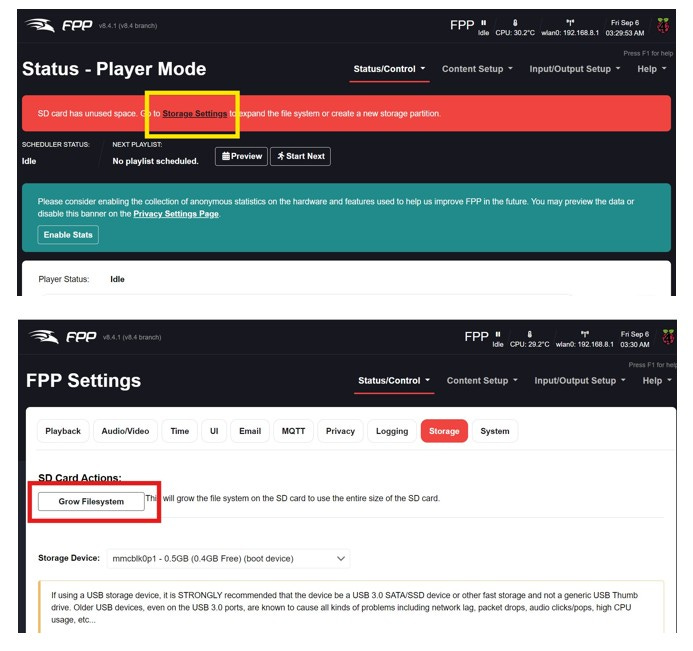
After a restart, expand the storage settings so the player has access to the entire microSD cards storage.
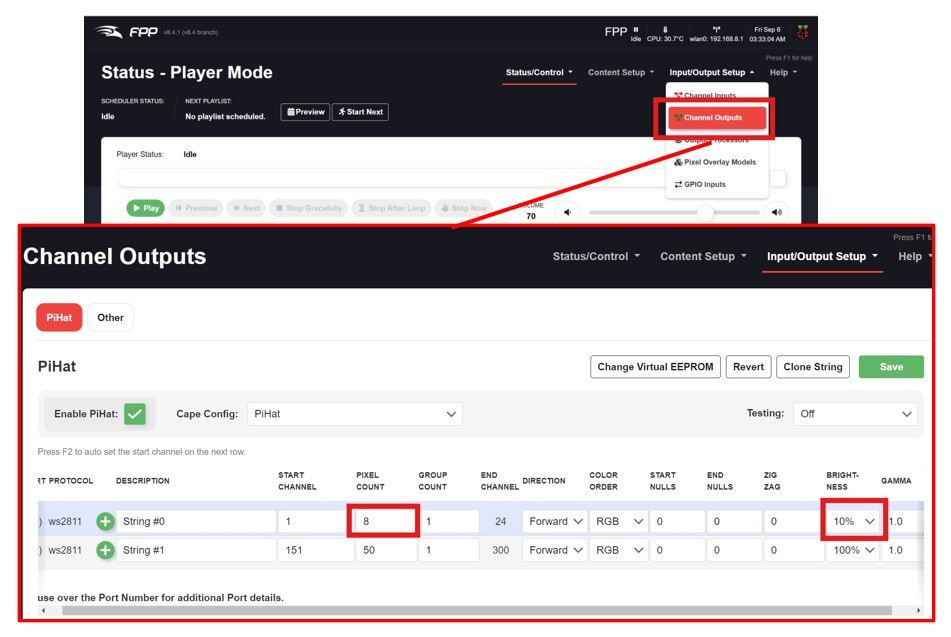
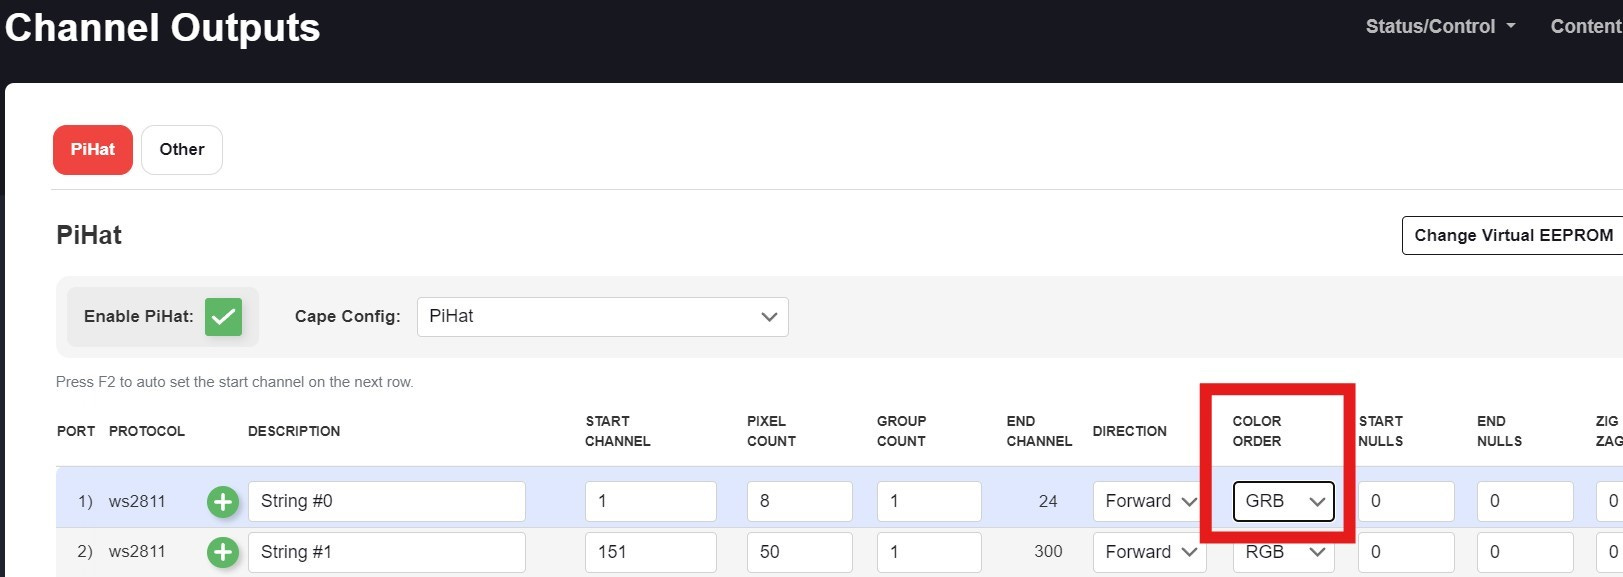
After the Falcon Player restarts, select the Input/Output Setup and select Channel Outputs. The PiHat should already be set as the Virtual EEPROM. Update String 0 to 8 pixels (3 channels per pixel (RGB), so 24 channels). Optionally, lower the brightness to 10%. And I think it requires another restart… (Update 3/29/2025, the Pi 5 requires PiHat(DPIPixels…) for the Cape Config setting)
When it comes back up, choose Status/Control and then select Display Testing.
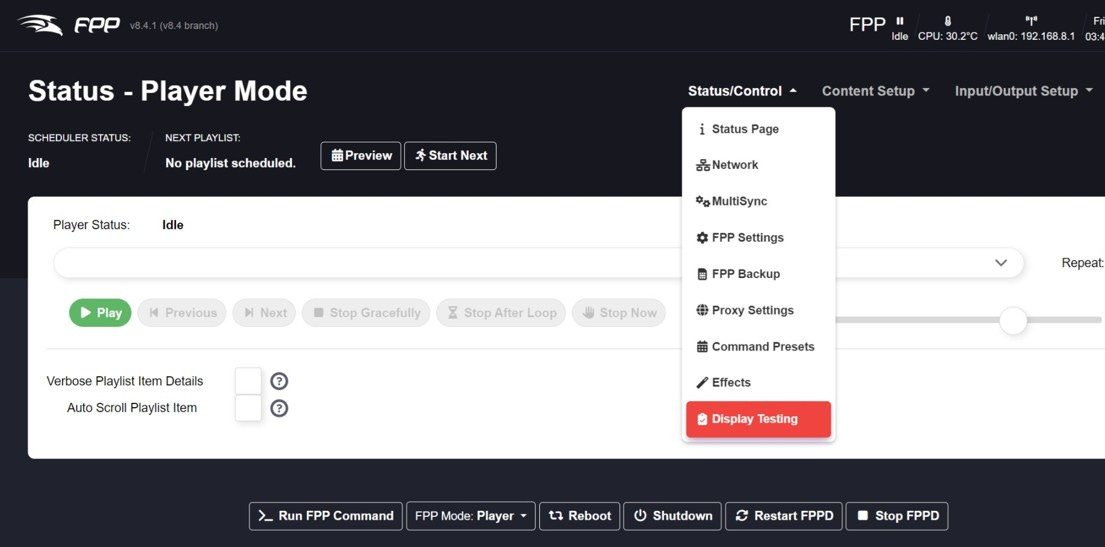
As soon as you check Enable Test Mode, the lights should come on. Experiment with some of the chase & cycle patterns.
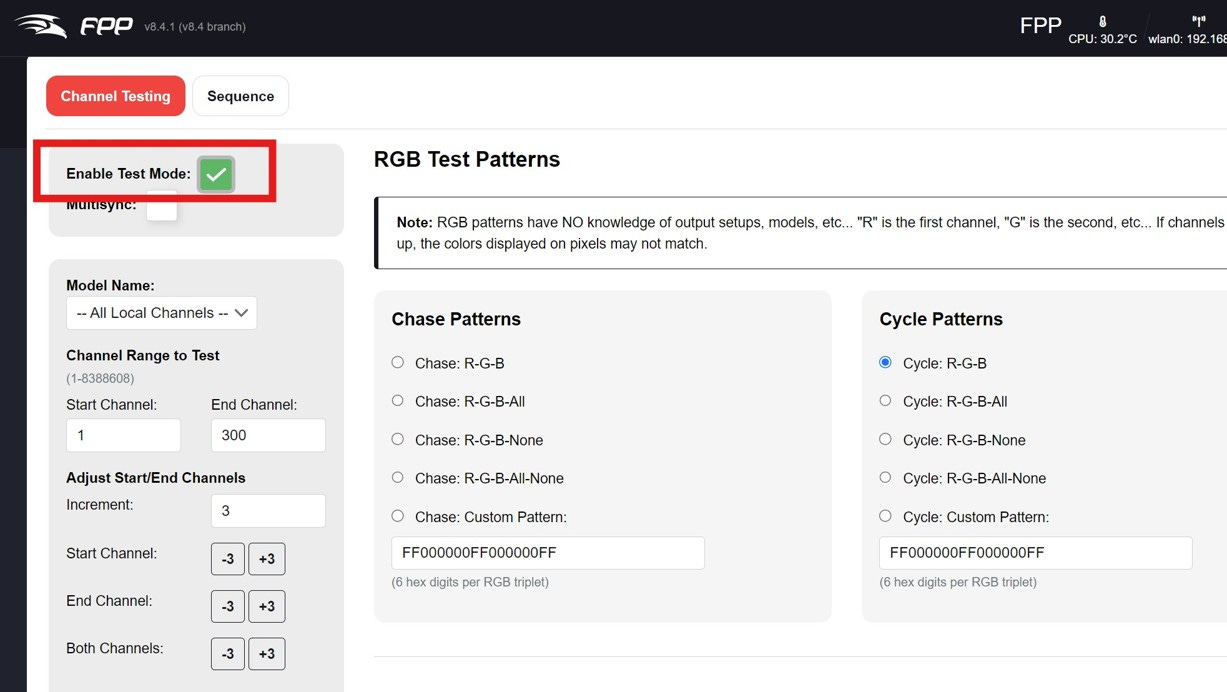
Test the pixel colors by clicking on Fill Color.

Turn off Red and Green and turn Blue all the way up.
Turn off Red and Blue and turn Green all the way up. And finally turn Red all the way up and turn Green and Blue off. In my case, the Red and Green were reversed. Go back to the Channel Outputs and change the color order.
The Falcon Player has been tested and is operating.